Over the past few months, I’ve worked a lot with Packer in my day job. It’s been quite a journey moving all the server templates used by my clients over to Packer. I’ve also been rebuilding my lab for a few weeks now, the Packer templates and associated Azure Devops pipeline was one of the first things I set up.
Setting up Azure Devops Agent
I’ve been getting familiar with Azure Devops over the past few months. So using that in my lab was going to be the fastest way to get going again. Over time, I will probably move this over to another product to broaden my horizon.
After you’ve set up your ADO tenant and project - which is out of the scope of this blog post - it’s time to setup our ADO agent.
To set up the agent, go to your project settings, Agent pools. Next, click on the pool you want to add the agent to, and on the top right click New agent. Follow the steps as outlined by the instructions and set up the agent. Microsoft actually has excellent documentation on this. You can find the documentation here.
Once the agent is set up, it’s time to set up Packer. Go to https://www.packer.io/downloads and download the packer version for your OS. I’m using a Windows agent, so I went ahead and downloaded the AMD64 build of packer for Windows. I downloaded the agent and put it in a c:\packer folder on my disk. Next, we need to make sure Packer is able to run. To do this, we will add the folder, we just created, to the %PATH% variable.
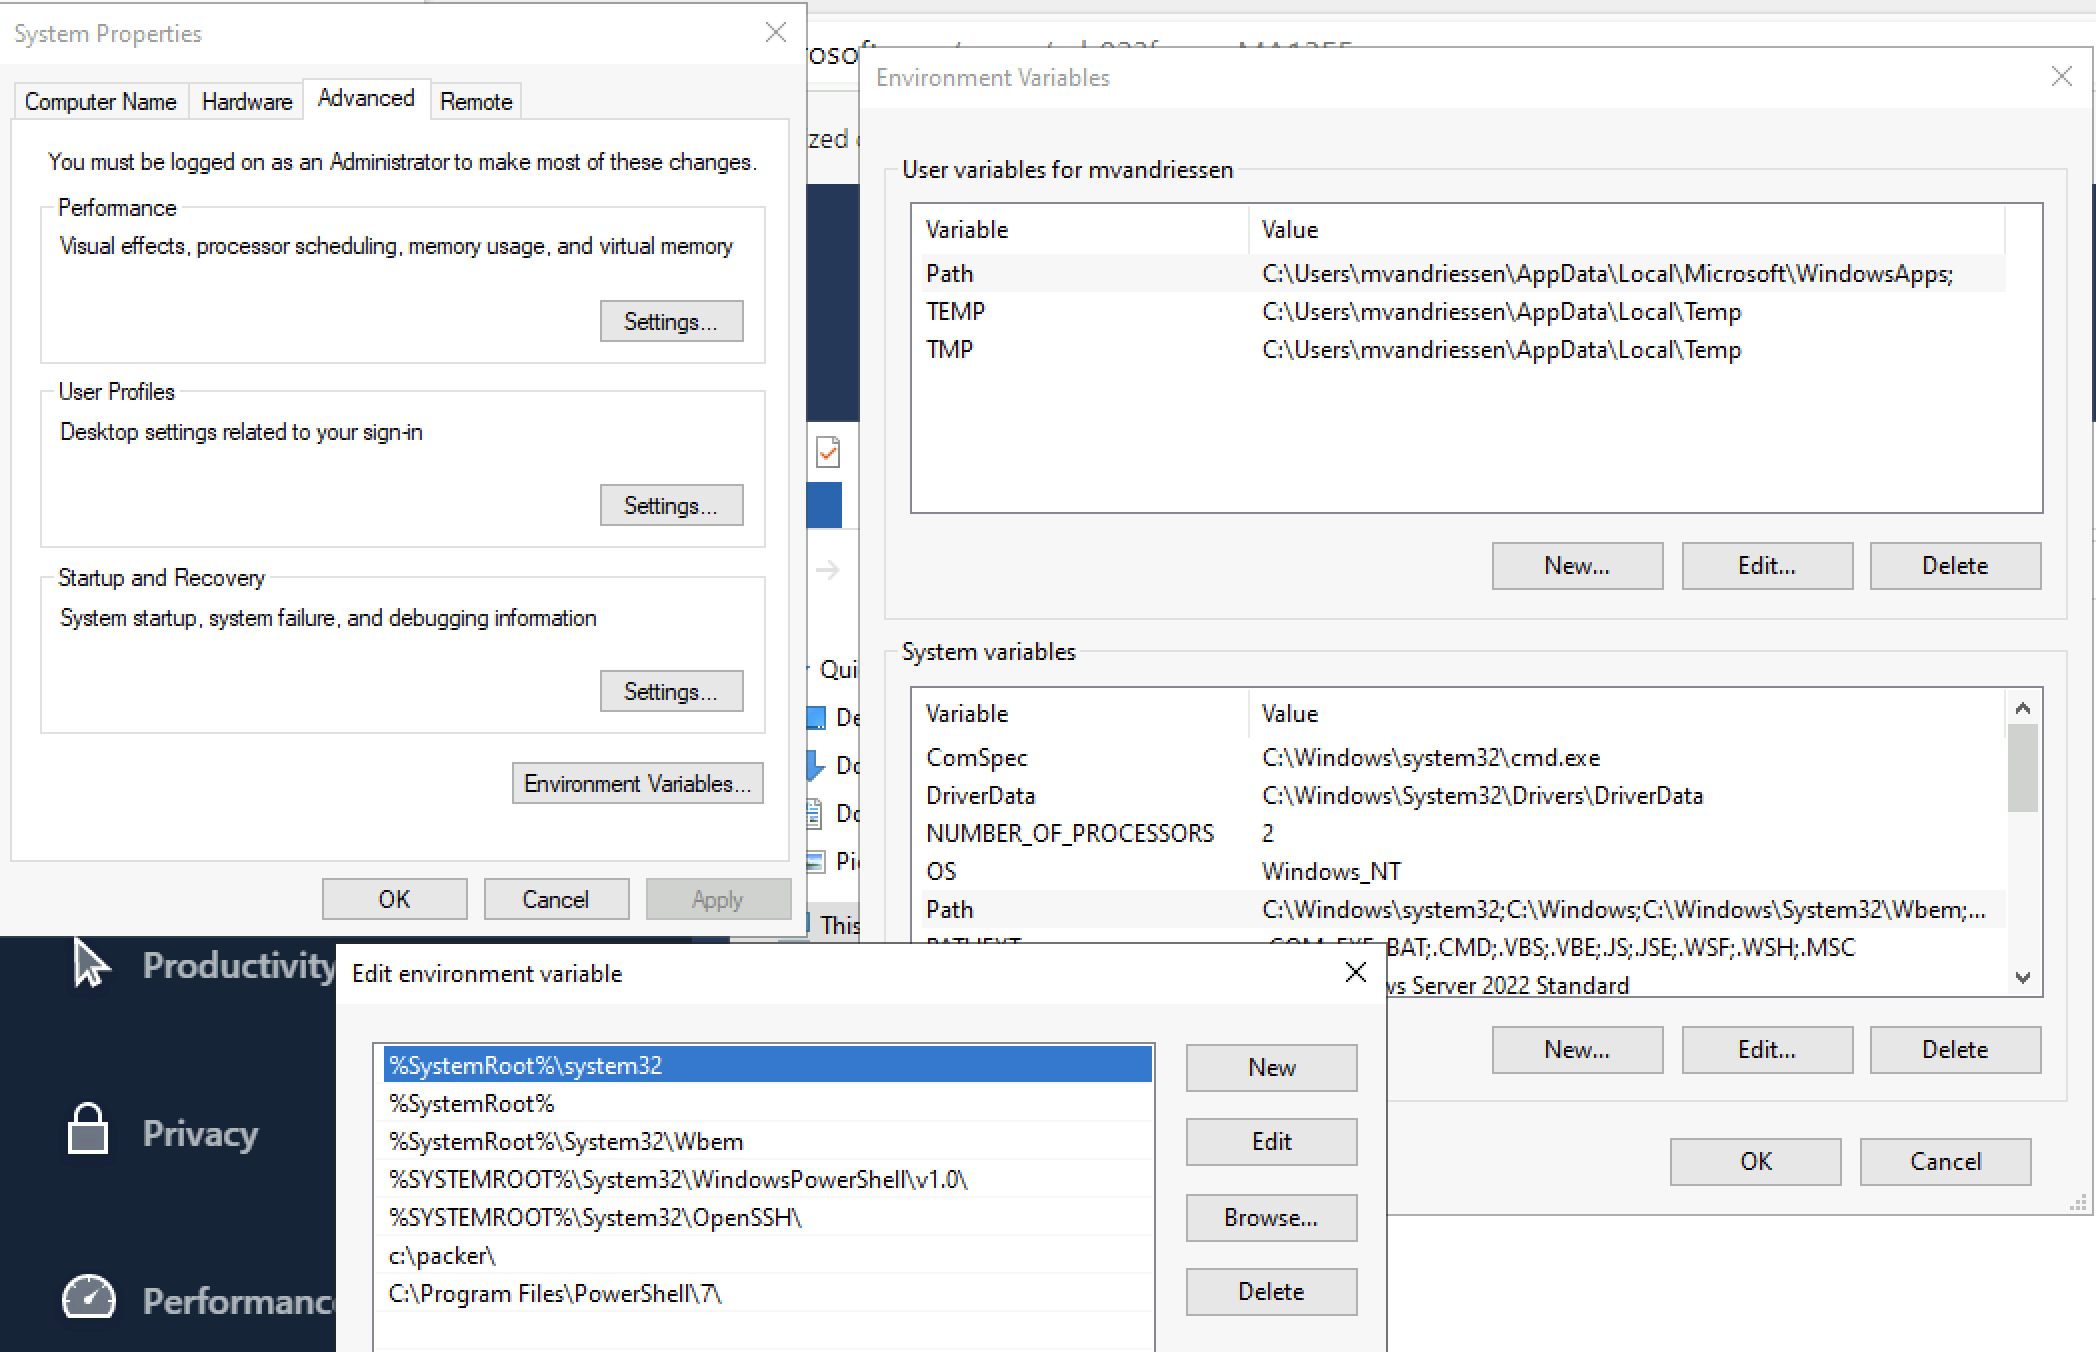
Open up your Advanced system settings, go to Environment variables and edit the PATH system variable. Next, click on New to add a new path and add the folder where you put the packer exe. In my case, it’s c:\packer
Setting up the repo
In your ADO project, hit the + sign at the top left and add a new repository. Name the repository to your liking and click on Create.
I’ve published my packer repository to Github, so you can download the files and upload them to your ADO repository or git tool of choice.
Setting up the pipeline
This is where we finally bring everything together. By setting up the pipeline to trigger on new commits, your packer templates will be rebuilt every time a new commit is pushed to the master branch.
The pipeline yaml file is also uploaded to my Github repository. To set it up, open Azure Devops, and go to Pipelines - Pipelines. Next, click on the new pipeline button and select Azure Repos Git (if you’ve followed along that is).
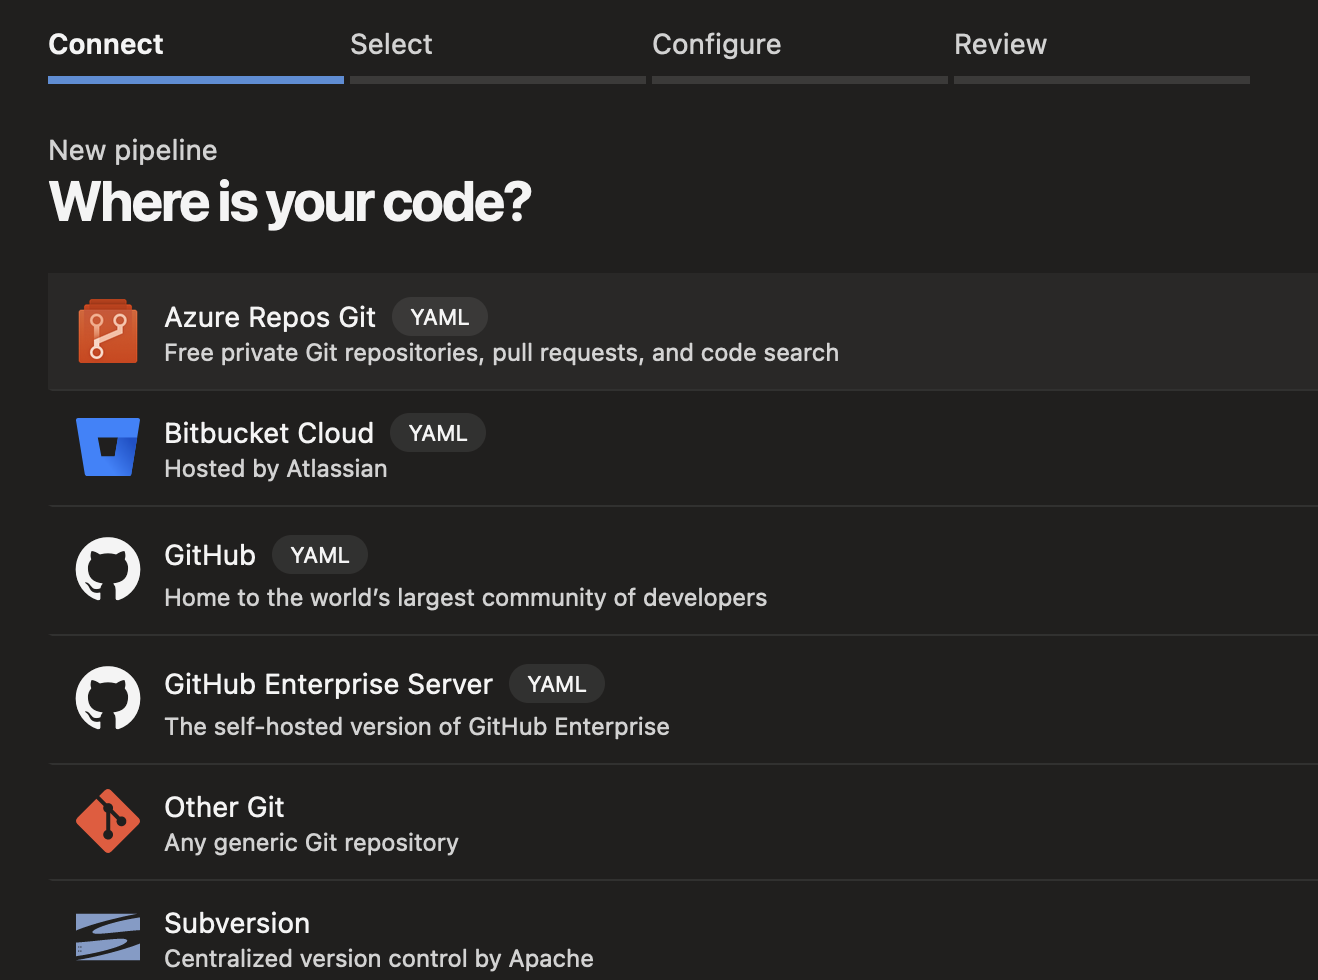
Select the repository you created and hit next. If you’ve uploaded the yaml file that I posted, you can hit Existing Azure Pipelines YAML file. If not, hit starter pipeline.
In the end, your pipeline should look like this
|
|
A couple of things to note, the pipeline uses PackerTool to get the latest version of Packer downloaded to the agent. You can add it to Azure Devops from the marketplace. If you add templates for other operating systems in the future, make sure you add them to the paths include at the top.
Packer templates
My packer templates are all built using the same windows.pkr.hcl file. In there, I’ve defined 3 sources; 1 for Server 2019, 1 for Server 2022, and another one for Server 2022 Core. The 3 different operating systems are defined as separate sources, but the actual config of those sources is largely the same.
This structure made it easier for me to support multiple operating systems that have the same config. For every OS, there’s a separate subfolder that contains the autounattend.xml file. I just found out you can use packer variables in there as well. This will allow me to consolidate everything into 1 autounattend file.
PowerShell scripts
To be able to run the PowerShell scripts, you will need to set up a webserver, that’s reachable from the machine being built. When I first got started, I looked at a lot of examples. While trying to wrap my head around the concepts of Packer, I didn’t want to spend a lot of time learning some additional config management tool.
I noticed in Mark Brookfield’s examples that he had a simple structure to get applications installed through PowerShell. I liked the simplicity of it and decided to follow his example. Check out his blog and Packer repo on Github. They helped me a lot and I’m sure they’ll be a great resource for you!